Programming with Arduino
Healthypi 5 can be programmed using the Arduino Integrated Development Environment (IDE). Arduino IDE is well-known for its user-friendly interface and simplicity, making it accessible to a wide range of developers, including those new to programming and electronics. Arduino programming allows users to customize the device's functionality, develop new features, and create applications that suit their specific needs.
The Arduino codebase is made available to aid newcomers in comprehending Healthypi and its features. Healthypi's primary development will take place on the Zephyr platform.
Programming Healthypi 5 consists of the following steps:
-
Programming the RP2040 core: Program the RP2040 core of Healthypi and unleash the USB streaming and the display functionality of Healthypi.
-
Programming the ESP32 core: Enable Healthypi's BLE capabilities by programming its ESP32 core.
-
Select the sketch file: The GitHub repo for Healthypi programming with arduino includes the sketches that need to be uploaded to the Healthypi 5.
Initial Setup to program RP2040 core of Healthypi 5
-
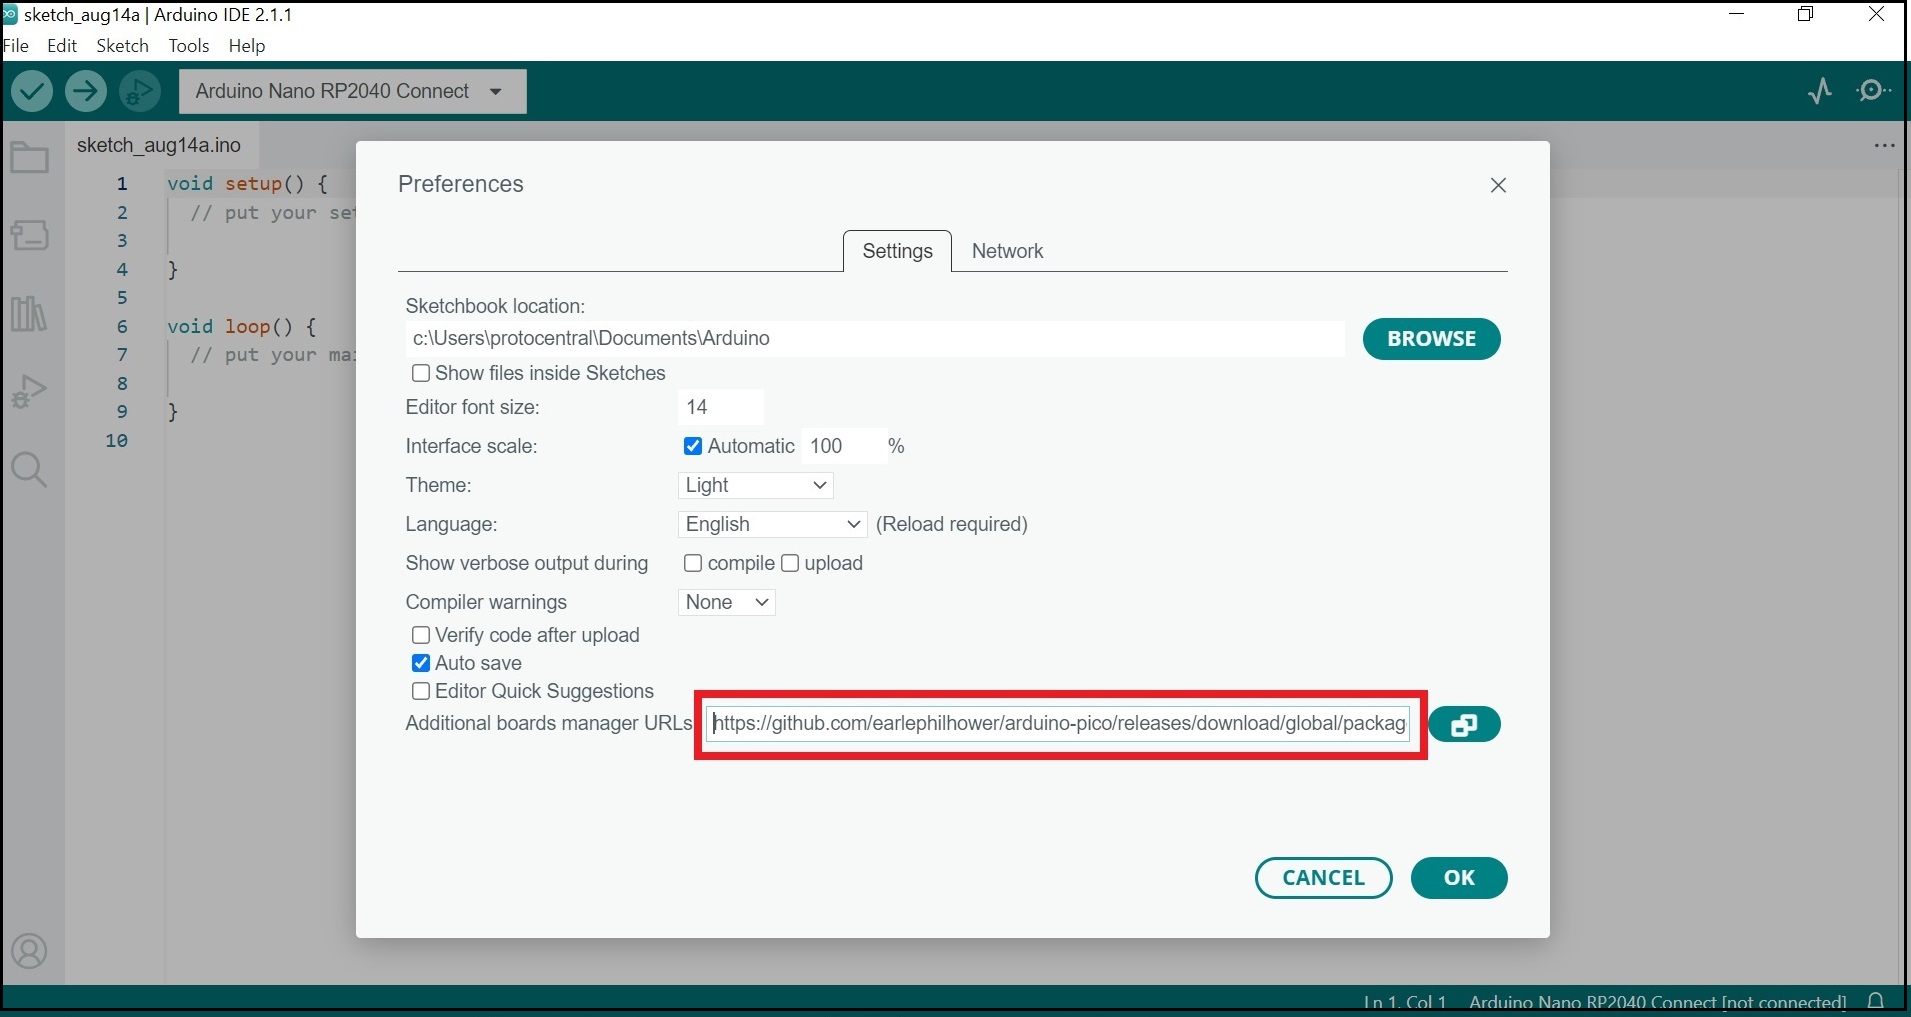
The first step is to install Earle Philhower's Arduino core for RP2040 devices, arduino-pico. This core supports a bunch of different RP2040 boards including Raspberry Pi Pico.
-
In the Arduino Ide go to Files -> Preferences and paste the below link in the Additional Board Manager URLs section and click OK.
Note
In case you have an existing JSON file's URL in the preferences (this is likely if you've installed ESP8266, stm32duino, or any such additional board in the IDE), you can just append the above path to the existing path, using a comma.
-
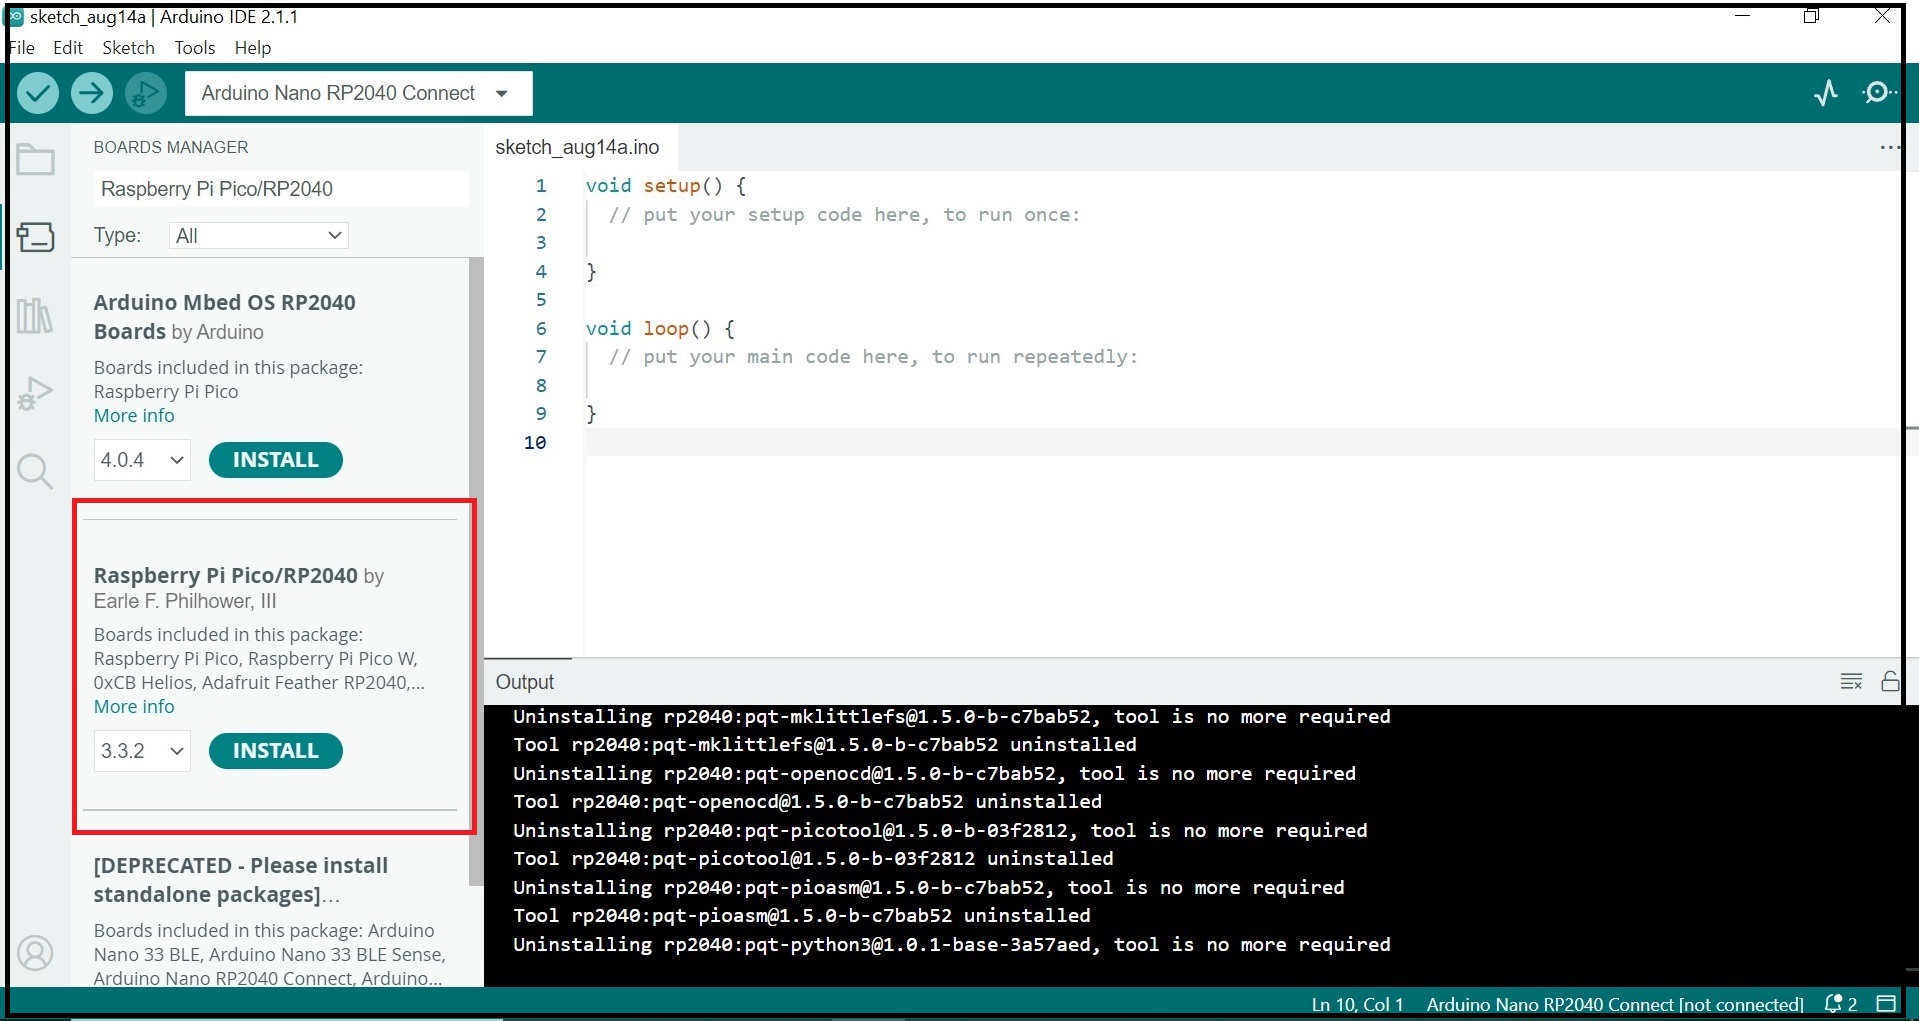
In the Arduino Ide go to Tools -> Board Manager and search for Raspberry Pi Pico/RP2040 by Earle F. Philhower,III ad install the latest version.
-
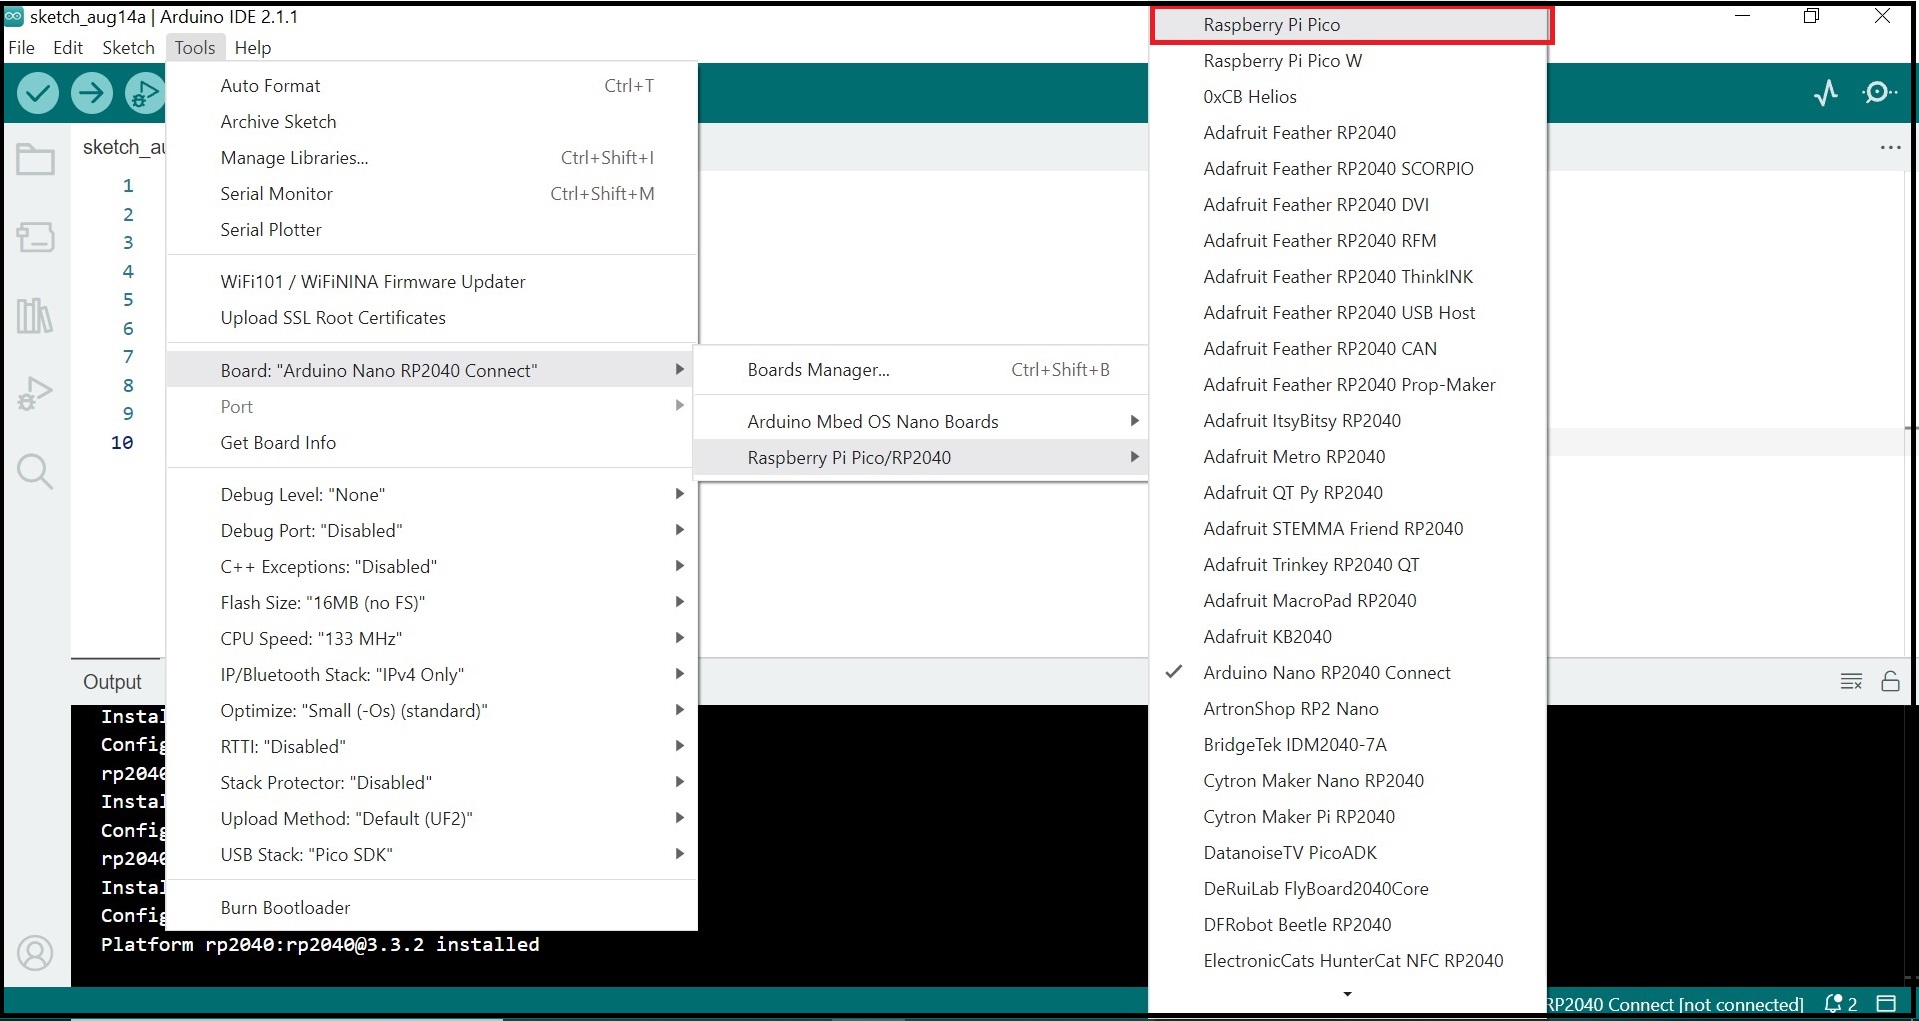
If Raspberry Pi Pico is installed peoperly, it will be visible in Tools in the following manner.
-
-
Download the protocentral_healthypi_5_firmware GitHub repo and open any of the apps.
-
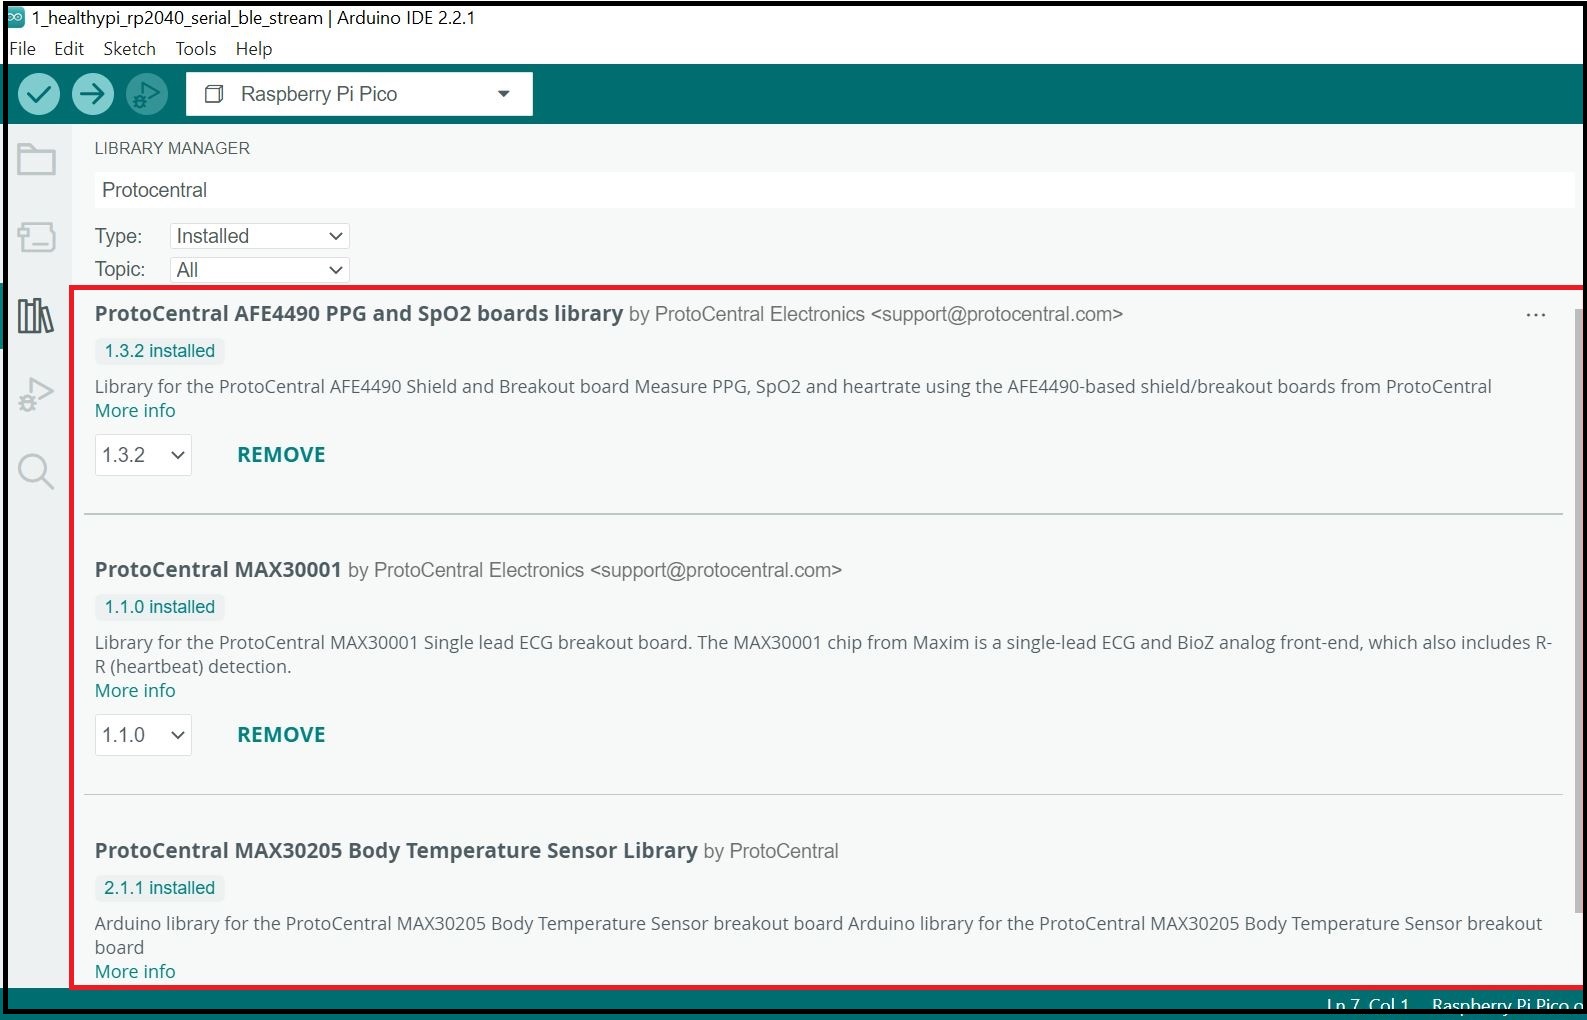
Adding library files of MAX30001, MAX30205 and AFE4490 to Arduino IDE. Browse to Sketch -> Include Library -> Manage Libraries. Search for Protocentral MAX30001 by Protocentral and install the latest version. Similarly search for Protocentral AFE4490 and Protocentral MAX30205 to install the library files of AFE4490 and MAX30205 respectively.
Initial Setup to program ESP32 core of Healthypi 5
-
To use the wireless capabilities of Healthypi 5, ESP32 needs to installed in Arduino IDE.
-
In the Arduino Ide paste the below link in the Additional Board Manager URLs section as described in the above step.
Note
In case you have an existing JSON file's URL in the preferences (this is likely if you've installed ESP8266, stm32duino, or any such additional board in the IDE), you can just append the above path to the existing path, using a comma.
-
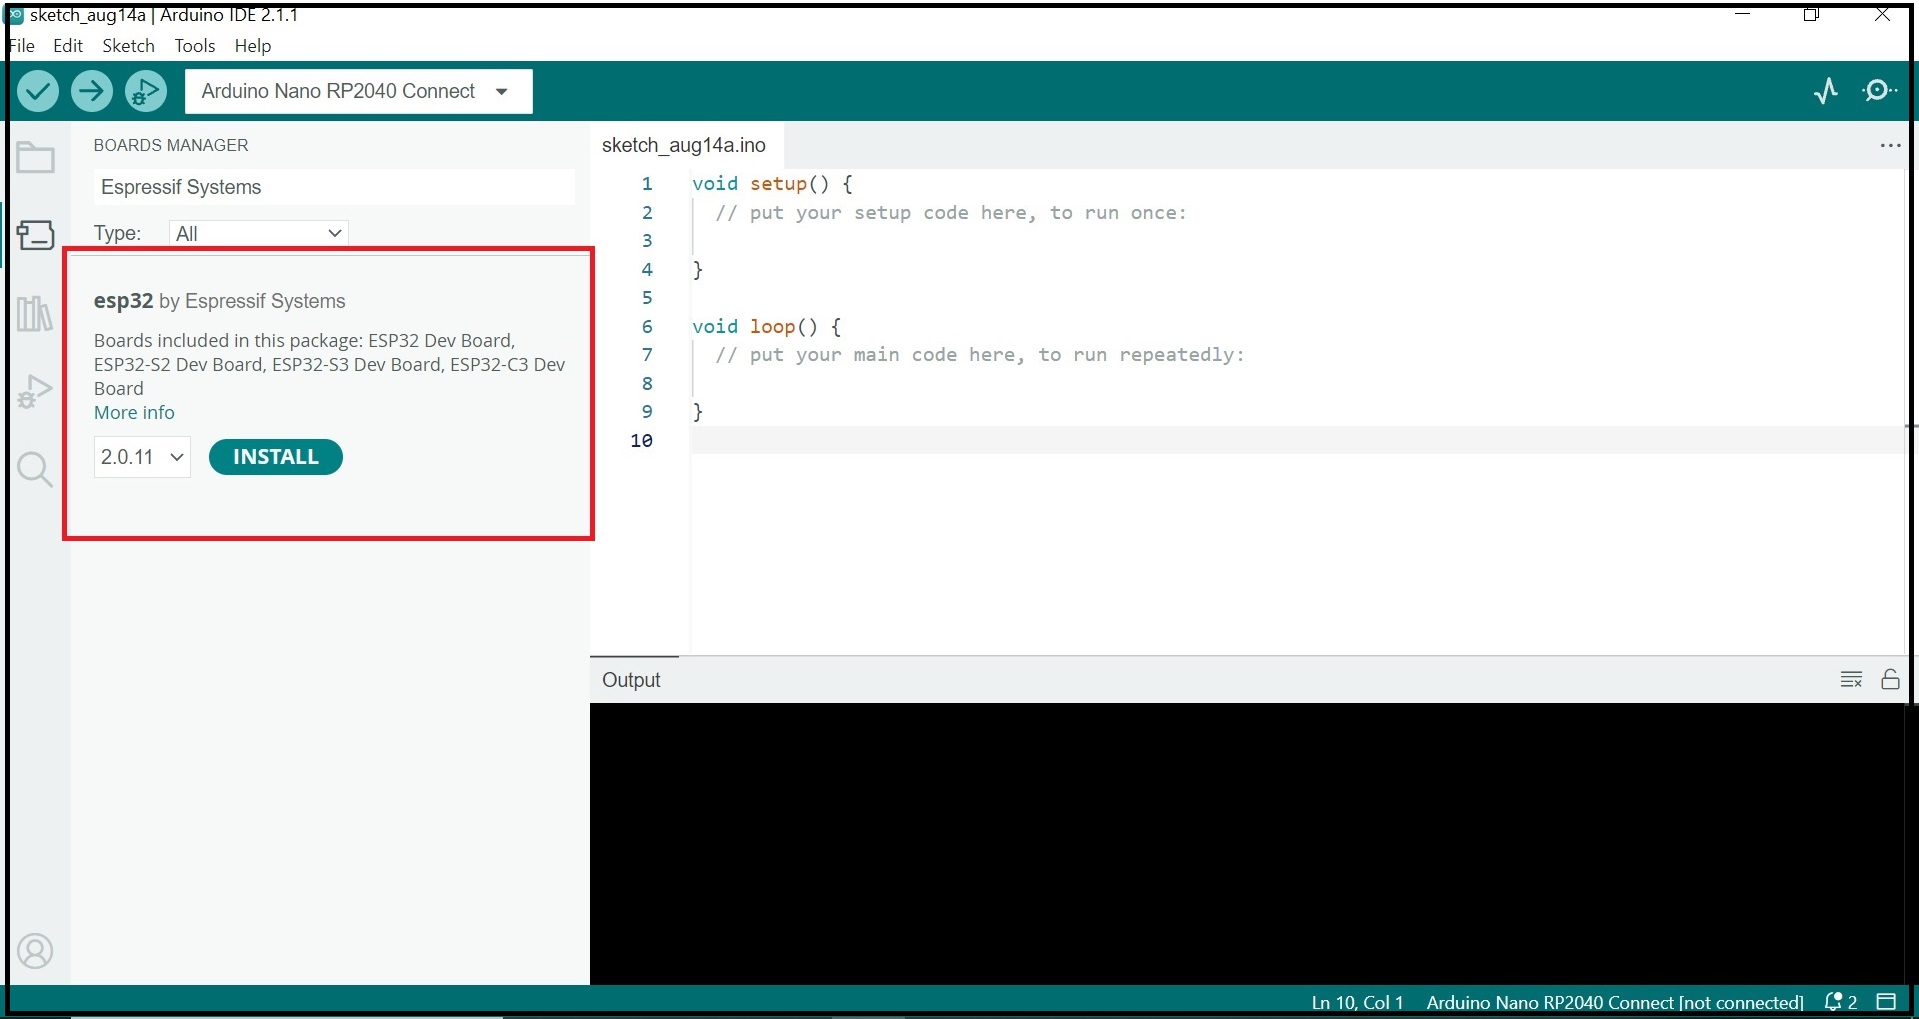
In the Arduino Ide go to Tools -> Board Manager and search for esp32 by Espressif Systems ad install the latest version.
-
-
If RP2040 is already programmed, skip to step 6. Download the protocentral_healthypi_5_firmware GitHub repo and open any of the apps.
-
Adding library files of MAX30001, MAX30205 and AFE4490 to Arduino IDE. Browse to Sketch -> Include Library -> Manage Libraries. Search for Protocentral MAX30001 by Protocentral and install the latest version. Similarly search for Protocentral AFE4490 and Protocentral MAX30205 to install the library files of AFE4490 and MAX30205 respectively.
Select the sketch file
The GitHub repo for Healthypi programming with arduino includes the sketches that need to be uploaded to the Healthypi 5.
Based on the operating modes sketches are available to upload the board.
-
Base mode: The sketch required for the base mode is available here. Upload the sketch using the steps described in this section.
-
BLE mode: Activate the BLE mode of Healthypi by uploading BLE sketch for RP2040 to RP2040 and BLE sketch for ESP32 to ESP32. Upload the sketches using the steps described in this section
-
Display mode: Activate the display mode of Healthypi by following the steps:
-
Install the
TFT_eSPIlibrary by Bodmer from the arduino libraries.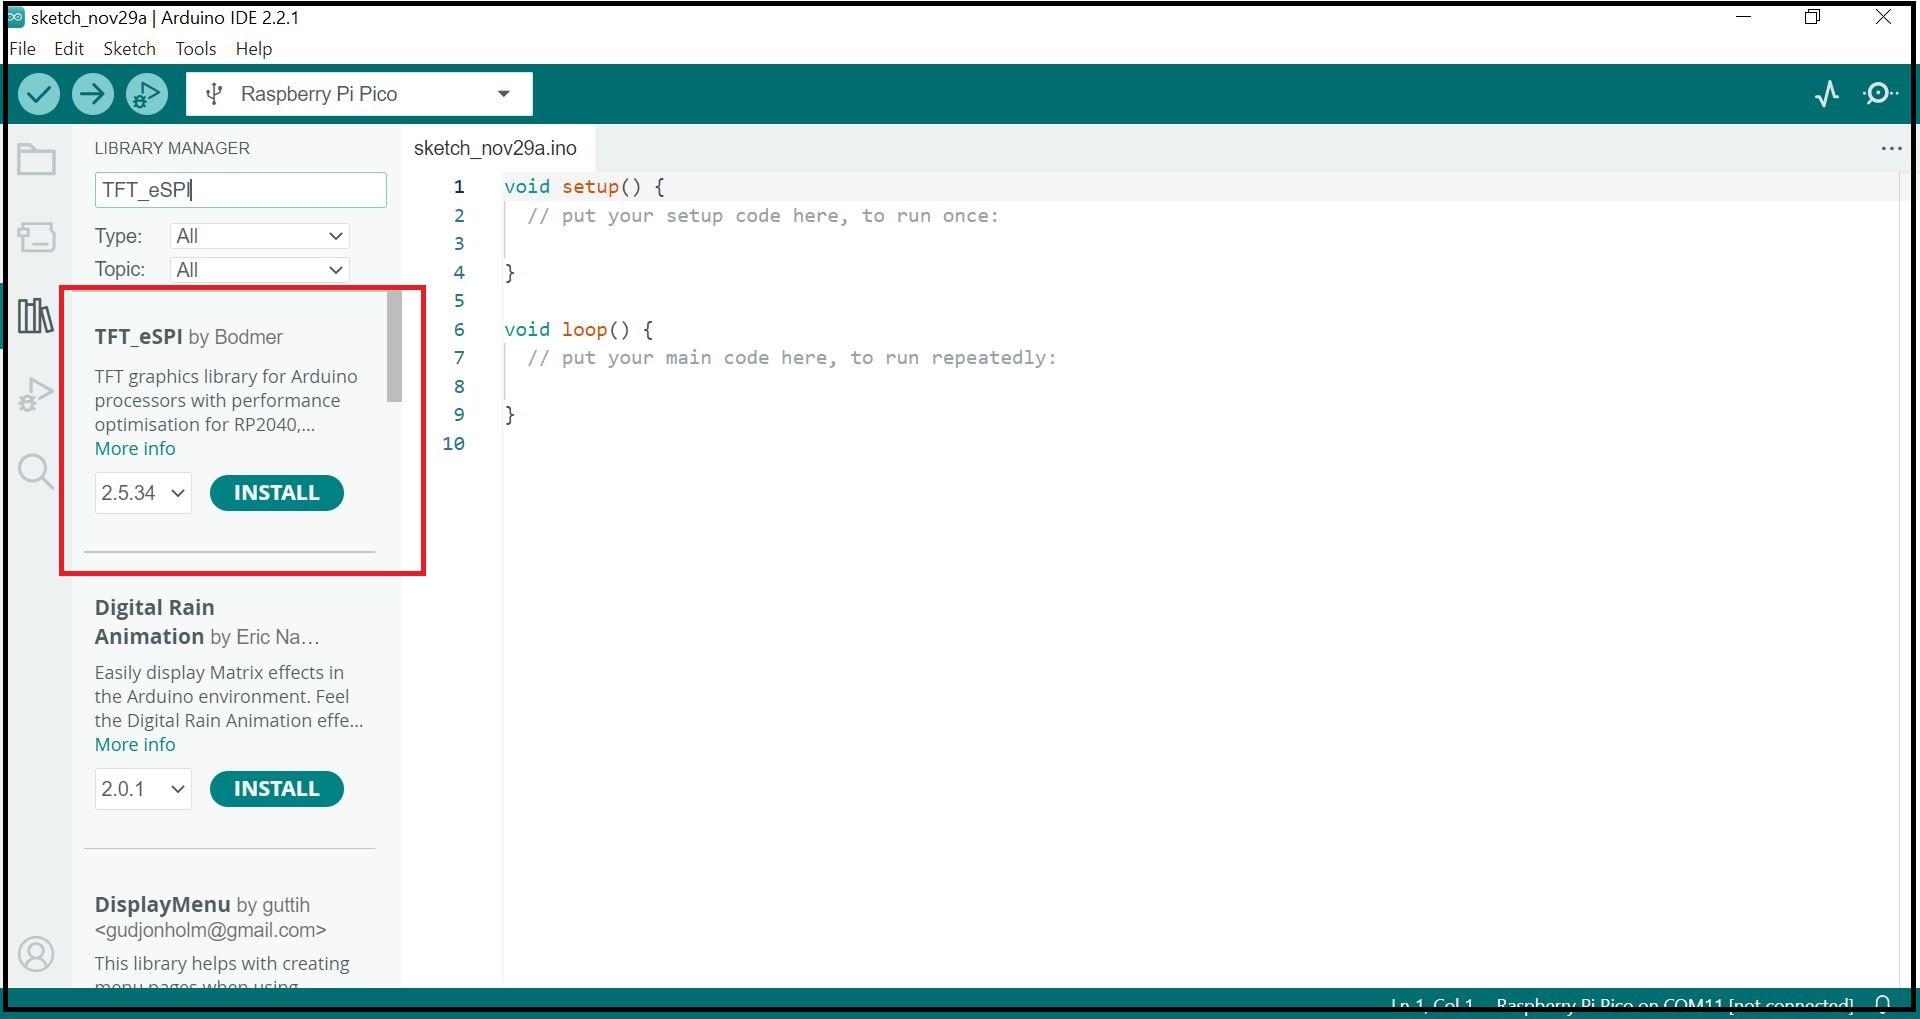
-
Copy "User_Setup_hpi5_2.h" into the TFT_eSPI library and set this file as the default display (see here for more info)
-
Change the "Optimize" setting in the "Tools" menu to "Optimize More (-O2)" or higher, due to limitations with the LVGL library
-
Upload the sketch to enable display mode using the steps described in this section
-
Upload the sketch file
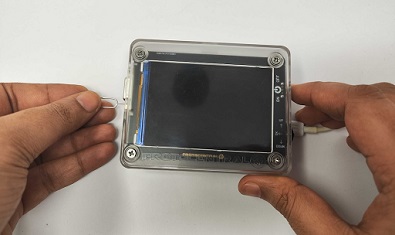
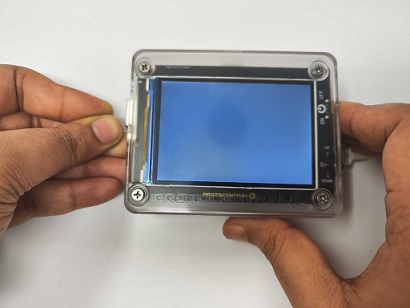
Upload the sketch file to the board and you have a Healthypi ready for vital monitoring.
If you have a enclosed Healthypi device, follow these steps:
-
Turn the device off and get ready to program the device.
-
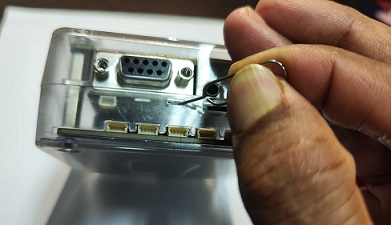
Press and hold the RP2040 boot button on the device. The RP2040 boot button is located on the side of the device, near the SpO2 port.
-
Turn on the device while holding the RP2040 boot button. The device will now boot up in programming mode. The device will be detected as a USB mass storage device on your computer and will be displayed as
RPI-RP2.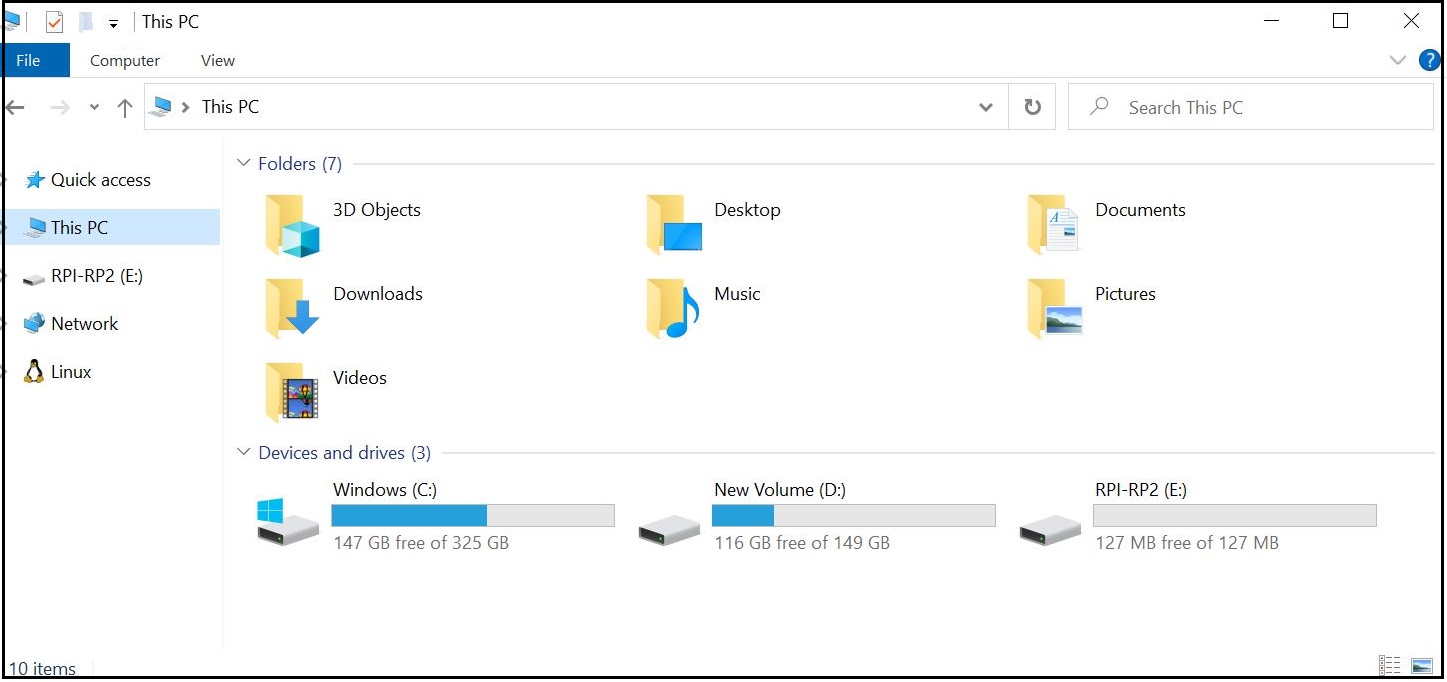
-
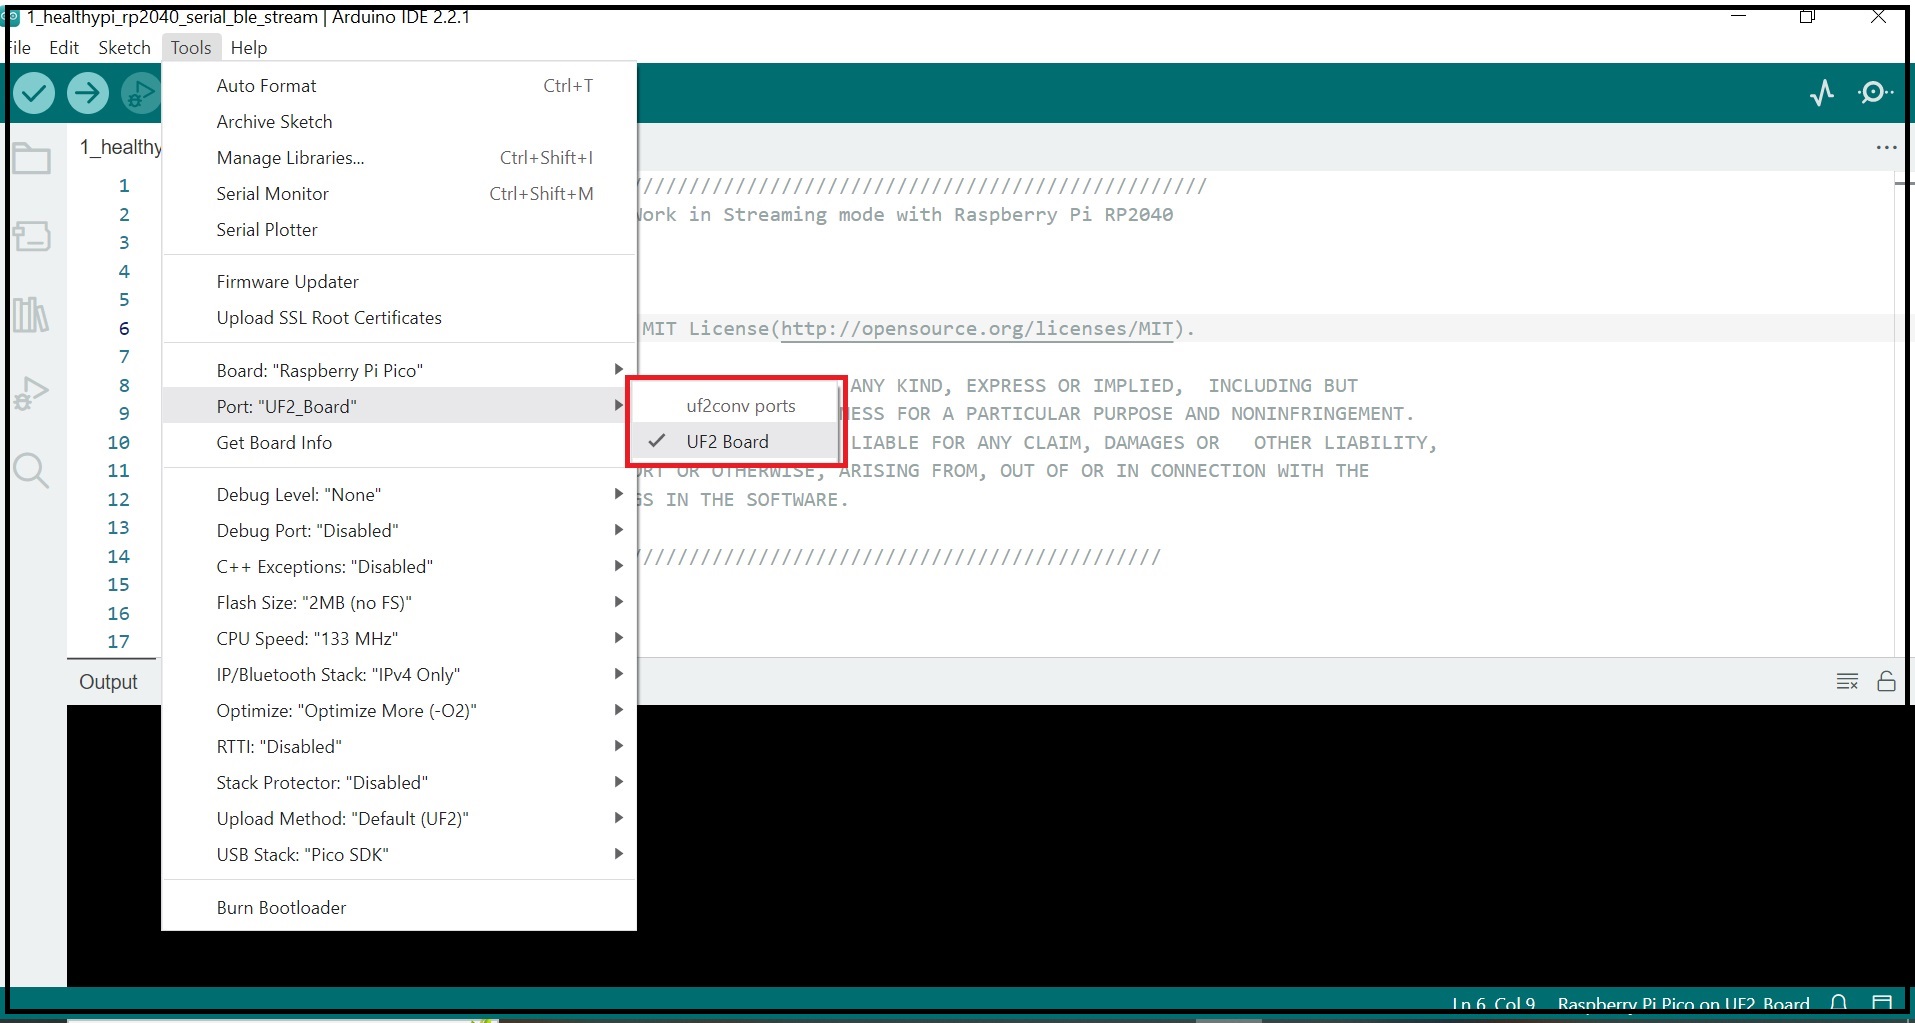
In the Arduino IDE, UF2 Board option in Tools -> Port.
-
Upload the sketch to the board by clicking on the Upload button in the IDE. On successful uploading, the board will reset.
If you have a open Healthypi device, follow these steps:
-
Connect the USB cable to a computer.
-
Uploading the sketch is done as follows:
-
Hold the Bootsel Button, connect the A port of the USB cable, hold the Reset Button along with the Bootsel Button and then release both the buttons together. This will ensure that the board acts as mass storage device and it can be confirmed by the UF2 Board option in Tools -> Port
-
Upload the sketch to the board by clicking on the Upload button in the IDE. On successful uploading, the board will reset.
-